Blank cells are silent saboteurs. They break the reports, pivot tables, and lookups, and make the dashboard unfinished and void. Even with proper data, sheets with blank cells have no meaning and do not contribute to further analytical assumptions. Rather than dealing with these silent killers of your data, you can make your data professional just by filling them up with text. Whether you fill them with descriptions like ‘Null’ or ‘N/A’, or stamp a placeholder in every empty cell, it can make your data more compact and complete. And the best part is you can do that with some easy tricks.
If you are stuck with the blank cells in your Excel, fill them up with ‘N/A’ by following these steps –
➤ Open the dataset and select the columns or ranges with blank cells.
➤ Press Ctrl + G to open the Go To window.
➤ Click on the Special button.
➤ In the Go To Special window, select Blanks and click OK.
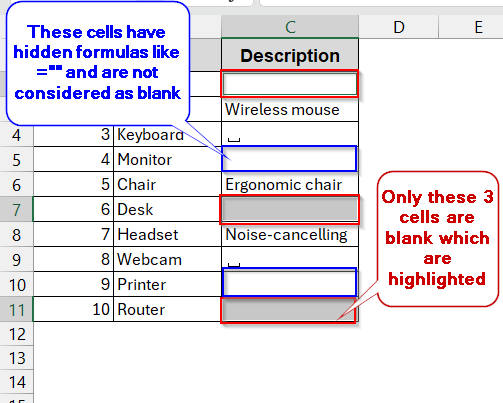
➤ This highlights the cells that are actually blank (without any hidden formulas).
➤ Manually write the text in one of the blank ones (for example – N/A).
➤ Press Ctrl + Enter to generate the same texts for all the blank ones.
If you like this quick one-click fix, we have a whole bunch for you like this. In the entire article, we will walk you around the corners of dynamic formulas that auto-fill, TRIM/LEN to check invisible spaces, repeated imports with Power Query and VBA Macros for a bulk dataset. Read on as we will guide you through the detailed step-by-step method that actually fits with your task and workbook.
Fill Blank Cells with Text Using Go To Special
The fastest and easiest way to stamp the blank cells with the text is to use Excel’s Go To Special option. It enables the user to identify the actual blank cells and highlight them. Without a formula, you can fill all those cells with any placeholder text you want.
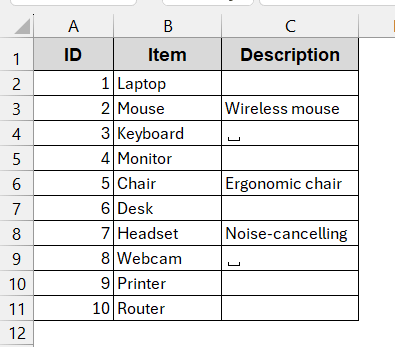
The following dataset will be used in this method. The column Description has blank cells that need to be filled with text.
Steps:
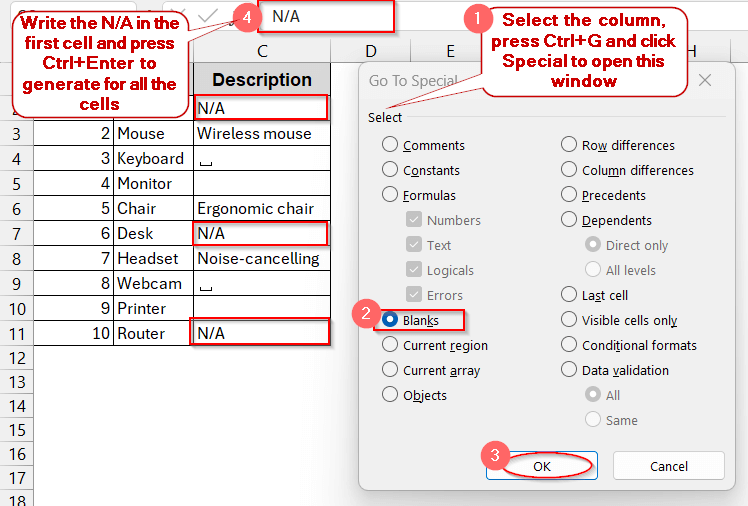
➤ Open the dataset and select the column (or range) that has blank cells.
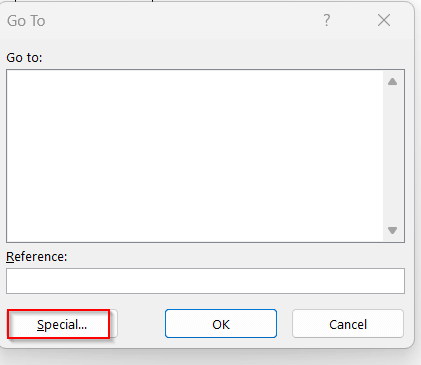
➤ Press Ctrl + G to open the Go To window.
➤ Click on the Special button in the window.
➤ It will open the Go To Special window. Select the Blank from there and click OK.

➤ This will highlight the blank cells that do not have any spaces or formulas.
➤ Enter the placeholder that you want to display instead of the blank cell in the first cell (e.g., N/A)
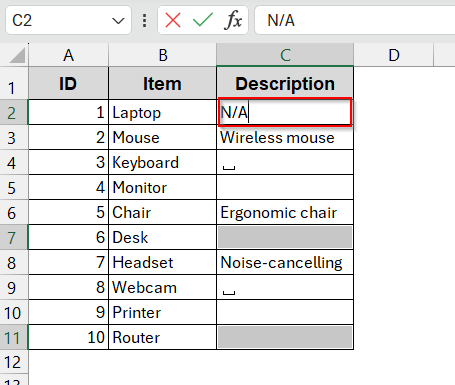
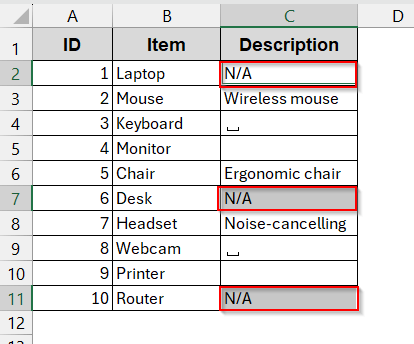
➤ Press Ctrl + Enter to display the N/A to all the cells.
Notes:
➨ This method can not identify cells with whitespaces and blank formulas.
➨ Go To Special option is not dynamic and needs to be performed again if blank cells are inserted later on.
Use IF Function to Replace Empty Cells with Text
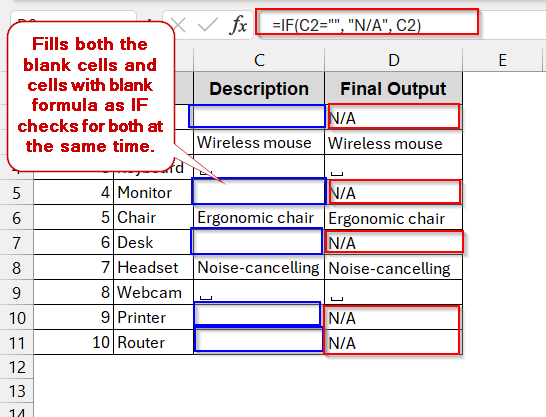
Unlike the Go To Special option, if you want to fill all the cells irrespective of whether they have white spaces or blank formulas, it’s better to go with the IF function. It does not distinguish between visibly blank cells and blank formulas; it automatically replaces them with text. However, if you do not want to eliminate the blank cells with formulas (which we rarely do), you can also combine IF with the ISBLANK function.
Steps:
➤ Open the dataset and create a new helper column to store the result.
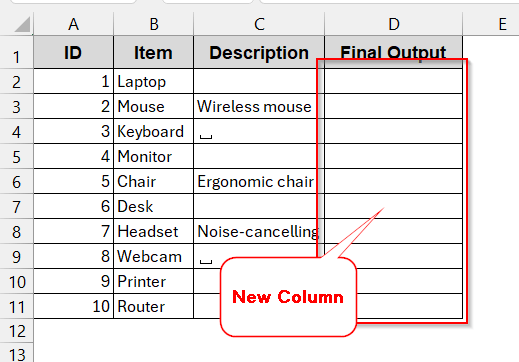
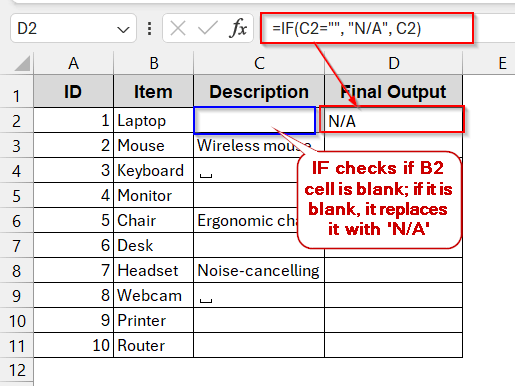
➤ In the first cell of the new column, write the IF function –
=IF(C2="", "N/A", C2)
Here, the IF function checks if the B2 cell is empty or not (by =“”). If it is blank, it is replaced with the placeholder “N/A”. Otherwise, the original value is kept the same.
➤ Press Enter to get the output.
➤ Drag the cells or use Fill Handle to apply the IF function to all the column cells.
➤ If you’re satisfied with the results, copy the new column and replace it with the old one.
Notes:
➨ You can also use TRIM/LEN with the IF formula if your blank cells have empty spaces. In that way, it will remove the spaces and fill them with placeholders that the IF function can’t do alone.
=IF(LEN(TRIM(C2))=0, “N/A”, C2)
➨ If you do not want to replace the blank cells with hidden spaces and formulas with placeholder text, use the IF function with the ISBLANK.
=IF(ISBLANK(C2), “N/A”, C2)
Apply Find and Replace to Insert Text in Empty Cells
Like the previous methods, there is another option in Excel that you can leverage to remove all the blank cells. The Find and Replace can help to detect the blank cells and replace them with a single, consistent value (like N/A or 0). This is one of the quickest methods and best for large datasets because of its one-click approach.
Steps:
➤ Select the column or range with the blank cells that need to be removed.
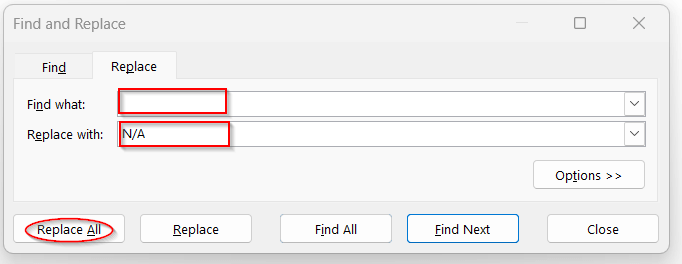
➤ Press Ctrl + H to open the Find and Replace window.
➤ Leave the Find what box empty, as we want to find the empty cells.
➤ In the Replace with box, enter whatever placeholder you want (e.g., N/A or Missing). And click Replace All.
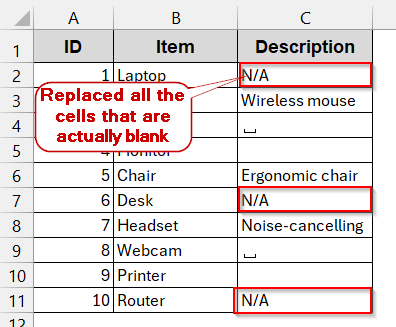
➤ This replaces all the blank cells with N/A or the text you have entered in the Replace with box.
Notes:
➨ Find and Replace is permanent and can’t be applied again if new blank cells are inserted.
➨ Use this method for static replacement, not for backups or dynamic logics.
Bring Value from Cells Above to Fill Blanks in Excel
Not always you will want to add the same placeholder texts for every blank row. Especially for preparing group data, you need to copy the text from the previous cell. And those cells often differ. In such cases, you may need to use the Go To Special option with some extra tweaks.
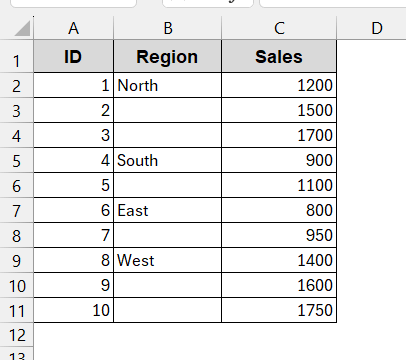
In this method, we used a different database of products with their Region and Sales. Here, the blank cells of the Region refer to the same region as the previous product.
Steps:
➤ In your Excel file, select the column that includes a grouped blank cell.
➤ Press Ctrl + G to open the Go To window.
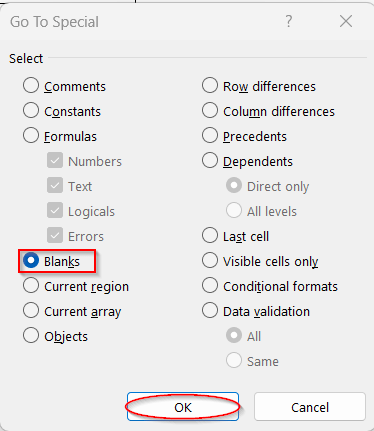
➤ Click on the Special option. It will open the Go To Special window.

➤ Select the Blanks and click on OK. This will highlight the blank cells.
➤ As the blank cells are highlighted, type the cell reference of the previous cell in the first blank cell.
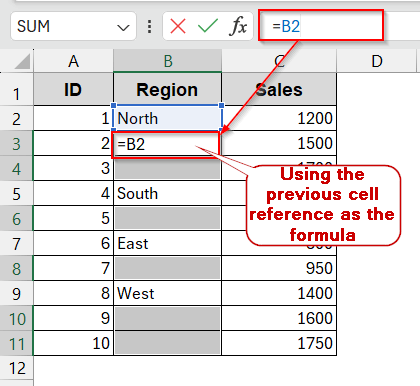
➤ Press Ctrl + Enter . It will apply the same formula (reference to the previous cell) to the blank cells.
Note:
This is a dynamic method and is updated every time the values of the non-blank cells are changed.
Power Query to Permanently Fill Blank Cells in Excel
Though Go To Special and Find and Replace are great quick fixes, they are not a reliable choice for scalable datasets. Imagine repeatedly using the same option as many times as you imported the data. It is too much of a hassle. In such large datasets with frequent imports, you can fill blank cells with the Power Query tools. It lets you set a one-time rule and is updated every time the data is refreshed.
Steps:
➤ Open the worksheet and select the entire dataset.
➤ Go to Data tab -> From Table/Range.
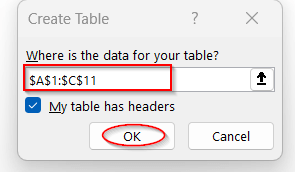
➤ In the dialog box, check the box My table has headers.
➤ This will open the Power Query Editor window with the table loaded into it.
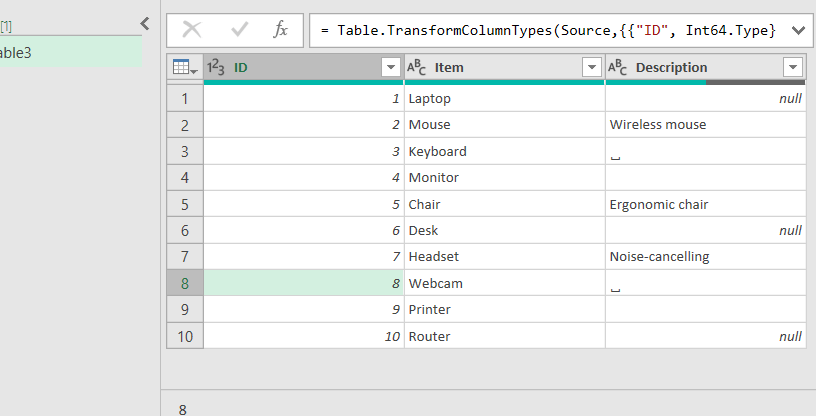
➤ The blank cells are quoted as ‘null’ and can be easily identified.
➤ Select the column with the blank cells (‘null’ values).
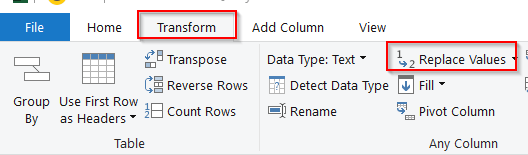
➤ Go to the Transform tab and select Replace Values
➤ In the Replace Value window, there are two fields for Value To Find and Replace With, which work exactly like Find and Replace.
➤ In the Value To Find, enter null. As the blank cells contain null text, putting nothing in the Value To Find will mean the blank cells will have a hidden formula.
➤ For the Replace With box, write N/A or anything you want as a placeholder.
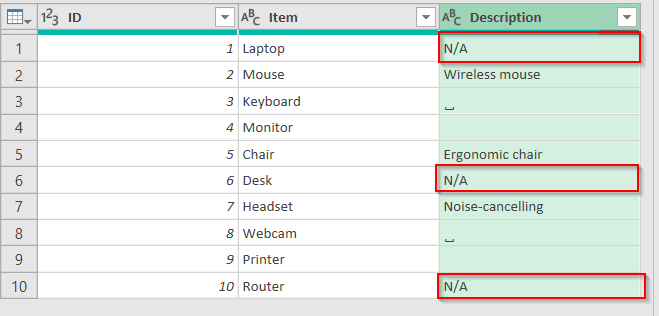
➤ This will replace all the cells with null values with N/A.
➤ If satisfied with the results, click on Close & Load, located in the Home tab of the Power Query Editor window.
Notes:
As we have seen in the earlier method, filling the blank cells of grouping requires different text for each blank cell. Most of the time, they need to be filled with the previous cells’ values. This can also be achieved by Power Query.
After loading the data in the Power Query Editor, go to the Transform tab and click on Fill. Choose the Down option to inherit the previous cells’ values.
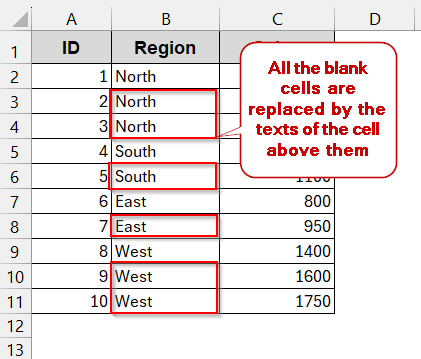
This replaces all the blank cells with the values of the previous cell.
One-Click VBA Script to Fill Blanks in Excel
Another alternative for large and repeated data is to use VBA Macros. In times when other methods seem too monotonous or repetitive, you can save a lot of time by using a simple and short VBA script to replace all the blank cells in Excel
Steps:
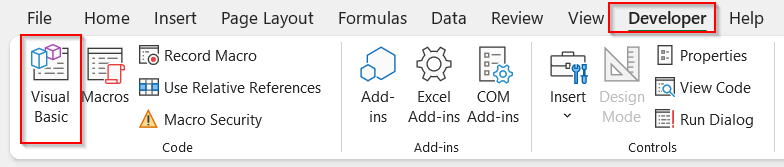
➤ In the worksheet, go to the Developer tab and click on Visual Basic.
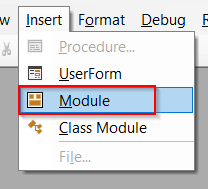
➤ In the VBA editor window, click on Insert and select Module.
➤ Paste the below VBA script in the space –
Sub FillBlanksWithText()
    Dim rng As Range
    Dim ws As Worksheet
    Set ws = ActiveSheet
    On Error Resume Next
    Set rng = ws.UsedRange.SpecialCells(xlCellTypeBlanks)
    On Error GoTo 0
    If Not rng Is Nothing Then
        rng.Value = "N/A"
    Else
        MsgBox "No blank cells found!"
    End If
End Sub![]()
➤ Save the VBA code by Ctrl + S and close the window.
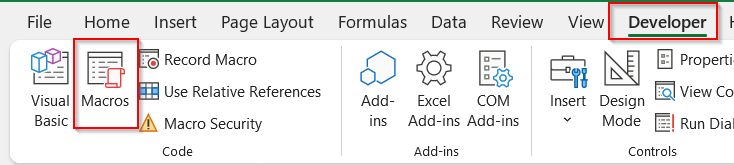
➤ In Excel, again go to the Developer tab to select Macros.
➤ In the Macros window, select the name of the VBA function created (FillBlanksWithText) and click on Run.
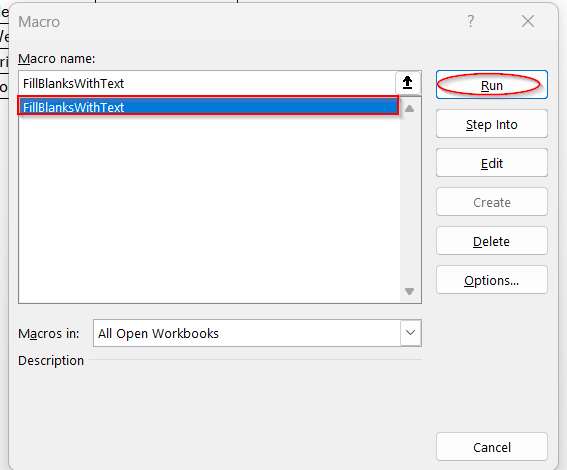
➤ This replaces all the blank cells with the N/A text as a placeholder.

Notes:
The Macro only detects the true blank cells and replaces them. To include cells with white spaces or blank formulas, use the TRIM and LEN functions in the code.
Frequently Asked Questions (FAQs)
Will formulas filling blanks slow down large workbooks?
To fill the blank cells with the formulas, you need to pair up additional logics like IF, ISBLANK, and TRIM. These functions recalculate every time the workbook is calculated. For large datasets, heavy use of these formulas is needed. As a result, this can slow down the performance of the datasets.
How do you remove a blank cell if it appears blank but has a formula returning “”?
If a cell has the formula returning “”, it usually looks blank. However, it can’t be detected by the Go To Special option or Find and Replace. In that case, use the IF function or TRIM/LEN to add a placeholder.
Can I fill in blanks with text but keep the original formatting?
Filling the blanks keeps the formatting the same, unless you use a helper column to paste the values. Thus, avoid overwriting the columns’ values to preserve the formatting styles.
Does Power Query preserve text when exporting to CSV?
Power Query can easily replace the blank cells with text and placeholders. Even without using any steps or formulas, it overwrites null in the rows by default. When loaded into a worksheet and exported into CSV, the raw data are preserved. However, the formatting and styles are lost in the new sheet.
How can I fill blank cells automatically when new rows are added?
Without using any static methods or functions, we can easily set the dynamic filling of the cells when rows are added. With formulas like IF or tools like Power Query and VBA Macros, you can refresh every time you add new rows of blank cells. It will automatically update the cells and add new text to them.
Concluding Words
As simple blank cells look, the reality is that they are the main culprit of mismatched analysis and skewed reports. The best way to get rid of them is to know how to fill blank cells with text in Excel. Thankfully, with Excel, you have an array of functions – Go To Special, Find and Replace, IF formula, along with advanced tools like Power Query and VBA Macros. All of them are simple and are one-click automation; all you need to know is which one to pick for which dataset. Go through each method, explore new techniques in each, and apply them in our downloadable workbook. As you curate your dataset according to the methods, you’ll know how smoother your Excel experience can be without blank cells.