
In Excel, you can prepare mailing labels without using Word. For example, you might have a list of names and addresses and want to arrange them into a label format for printing. In these cases, Excel’s formulas and formatting options can help you build multi-line labels directly inside a worksheet.
There are a few ways to create labels in Excel. Functions like CHAR, &, CONCAT, and TEXTJOIN can help you organize your data and fit it neatly into your label layout.
In this article, we’ll learn how to create labels in Excel without Word using a simple dataset of names and addresses.
Here’s how to create labels directly in Excel using CHAR and & functions:
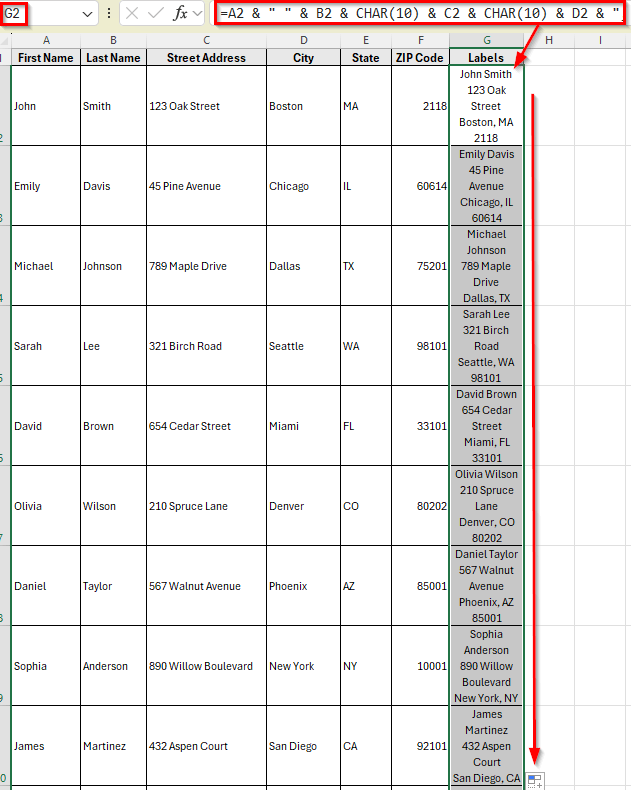
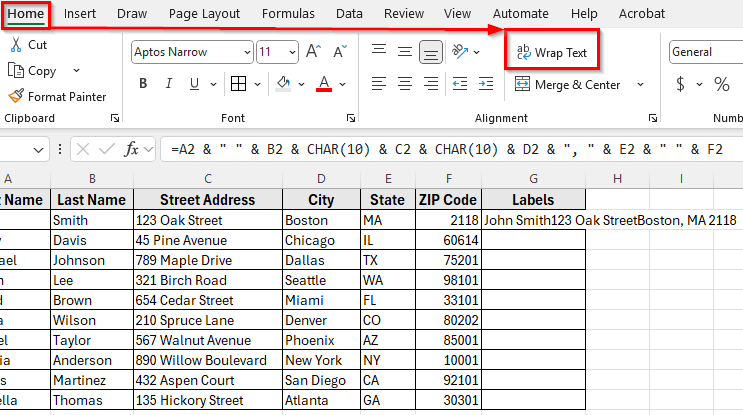
➤ Open your dataset in Excel.
➤ Click on cell G2 and enter the following formula:
=A2 & ” ” & B2 & CHAR(10) & C2 & CHAR(10) & D2 & “, ” & E2 & ” ” & F2
➤ Press Enter. Now you’ll see the full name and address combined into one cell, displayed across multiple lines.
➤ Go to the Home tab and click Wrap Text.
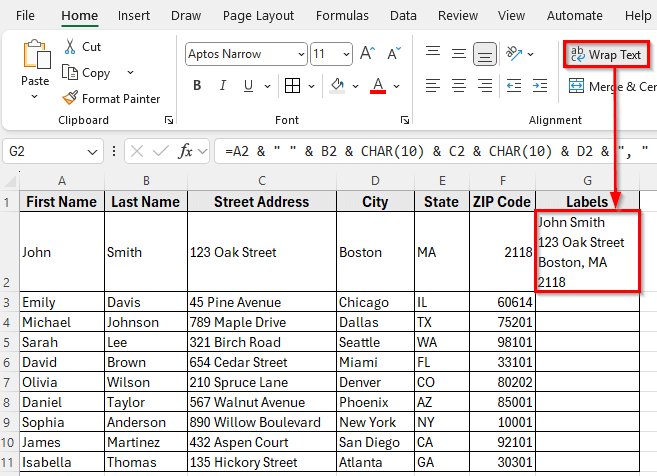
➤ Now, each part of the address shows on a new line.
➤ Next, click on Home >> Merge & Center.
➤ It will align your label content neatly in the center of the cell.
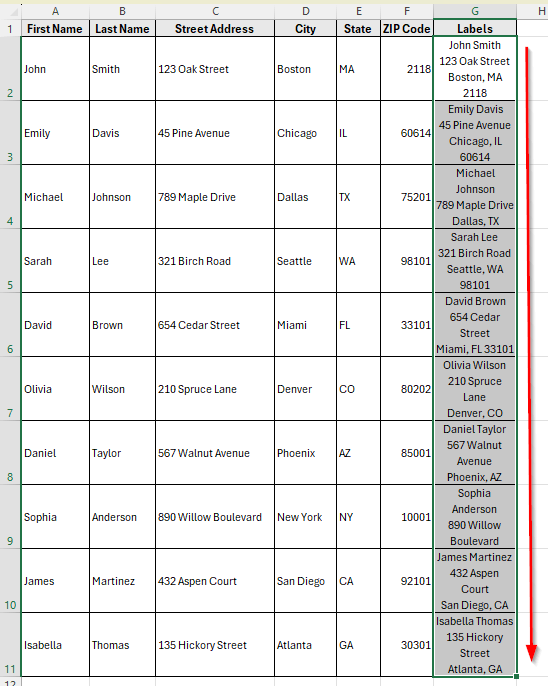
➤ Drag the fill handle down to apply the formula to all rows.
Using CHAR and & Functions to Create Labels in Excel Without Word
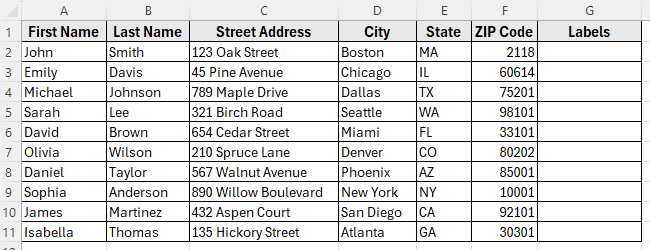
In the following dataset, we have a list of people with their mailing information. Column A contains the First Name, Column B has the Last Name, Column C contains the Street Address, Column D lists the City, Column E is the State, and Column F contains the ZIP Code.
Our goal is to combine this information into a formatted block of text that can be used as a label. We’ll create the label in Column G, which will display each entry in a multi-line format suitable for printing.
The most common way to create labels in Excel is by combining multiple fields into one cell. This lets you display the full name and address in a multi-line format that’s ready to print.
Here’s how to do it:
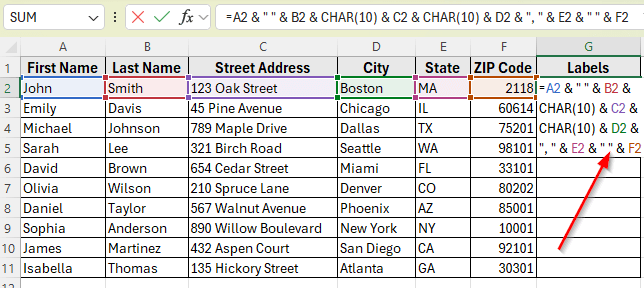
➤ Open your dataset in Excel.
➤ Click on cell G2 and enter the following formula:
=A2 & " " & B2 & CHAR(10) & C2 & CHAR(10) & D2 & ", " & E2 & " " & F2
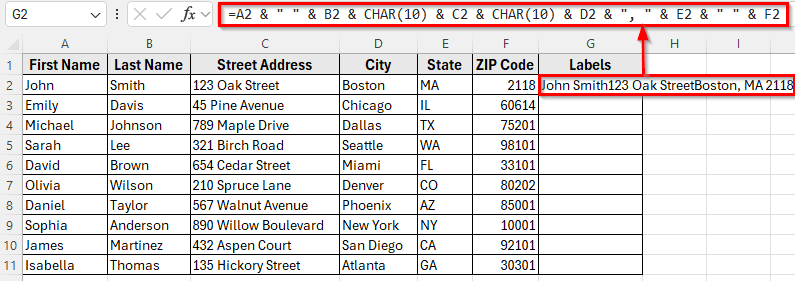
➤ Press Enter. Now you’ll see the full name and address combined into one cell, displayed across multiple lines.
➤ Go to the Home tab and click Wrap Text.
➤ Now, each part of the address shows on a new line.
➤ Next, click on Merge & Center.
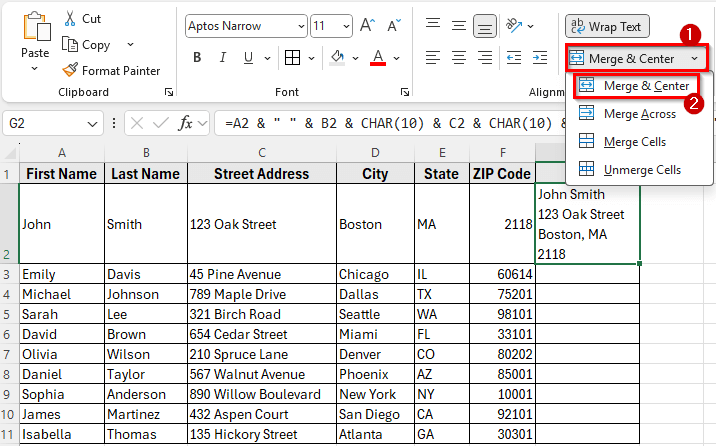
➤ It will align your label content neatly in the center of the cell.

➤ Drag the fill handle down to apply the formula to all rows.
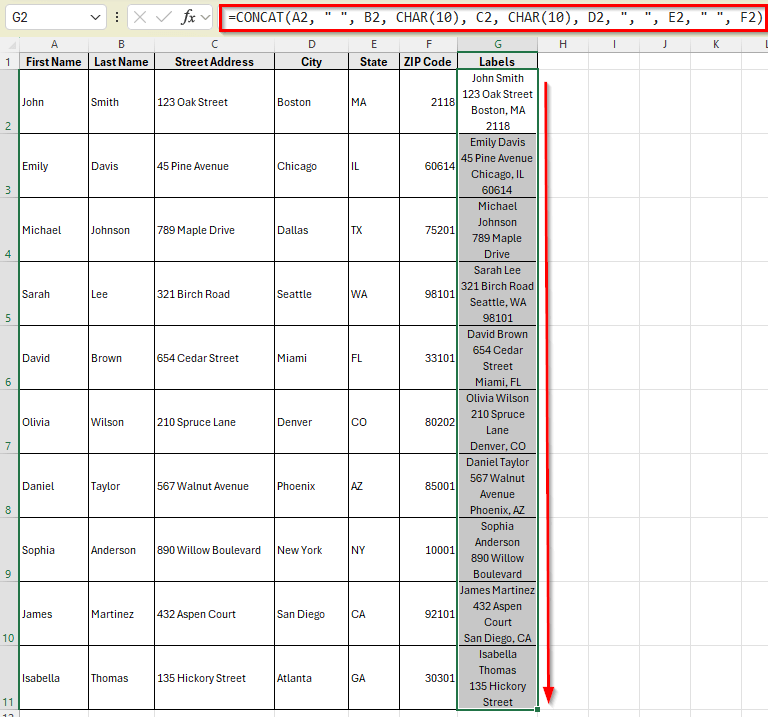
Using CONCAT Function for Cleaner Formulas
If you’re using a modern version of Excel (2016 or later), you can use the CONCAT function instead of & to combine fields into one label. This makes the formula shorter and easier to read.
Here’s how to do it:
➤ Open your dataset in Excel.
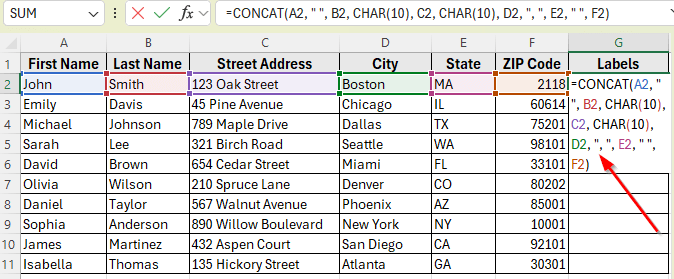
➤ Click on cell G2 and enter this formula:
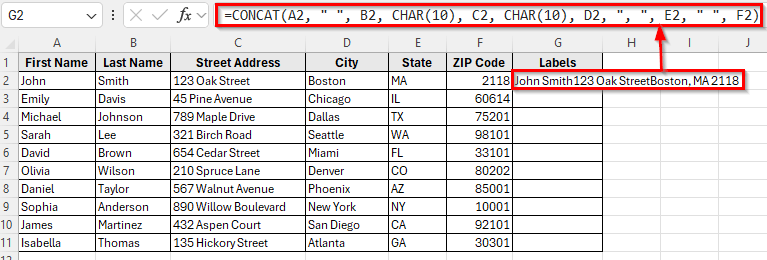
=CONCAT(A2, " ", B2, CHAR(10), C2, CHAR(10), D2, ", ", E2, " ", F2)
➤ Press Enter. Now you’ll see the address information neatly combined into one block inside the cell.
➤ Go to the Home tab and click Wrap Text to display the address on multiple lines.
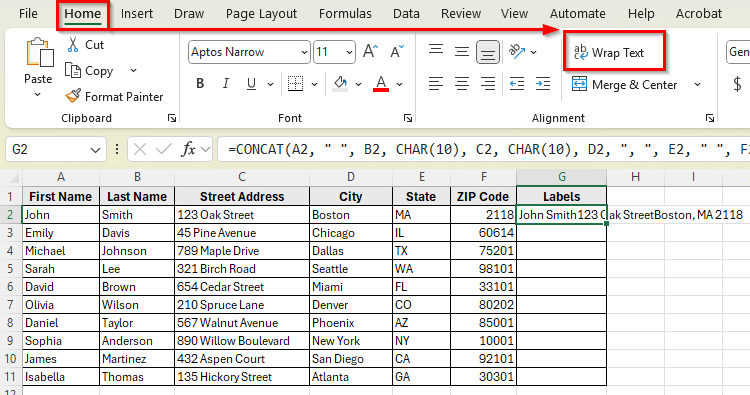
➤ Now, each part of the address shows on a new line.
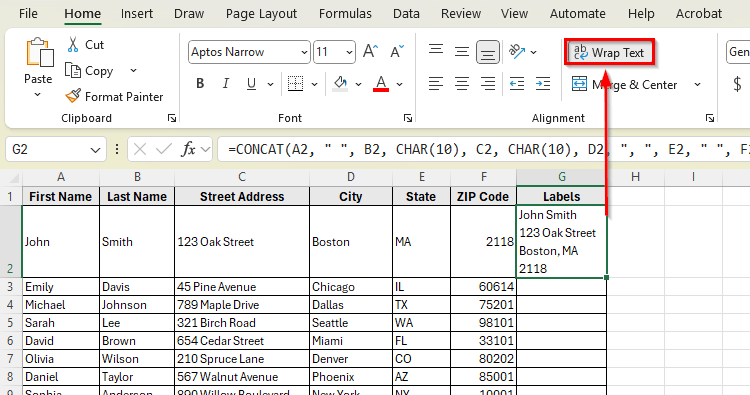
➤ Next, click on Merge & Center.

➤ It will align your label content neatly in the center of the cell.

➤ Drag the fill handle down to copy the formula to all rows.
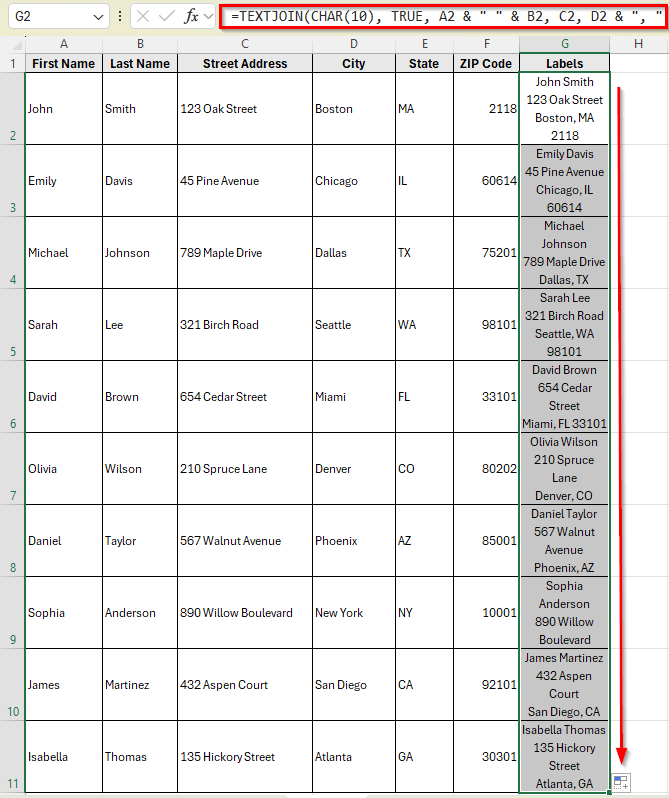
Applying TEXTJOIN Function to Create Labels Easily
The TEXTJOIN function lets you combine multiple fields with a chosen delimiter. In this case, we’ll use CHAR(10) as the delimiter so each part of the address appears on a new line.
Here’s how to do it:
➤ Open your dataset in Excel.
➤ Click on cell G2 and enter this formula:
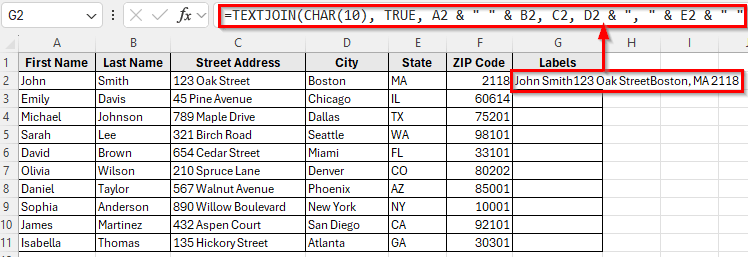
=TEXTJOIN(CHAR(10), TRUE, A2 & " " & B2, C2, D2 & ", " & E2 & " " & F2)
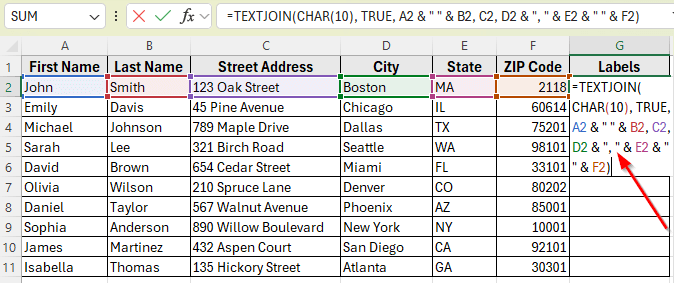
➤ Press Enter. Now you’ll see all the fields combined into one cell, arranged as a mailing label.
➤ Go to the Home tab and click Wrap Text so the address breaks into multiple lines.
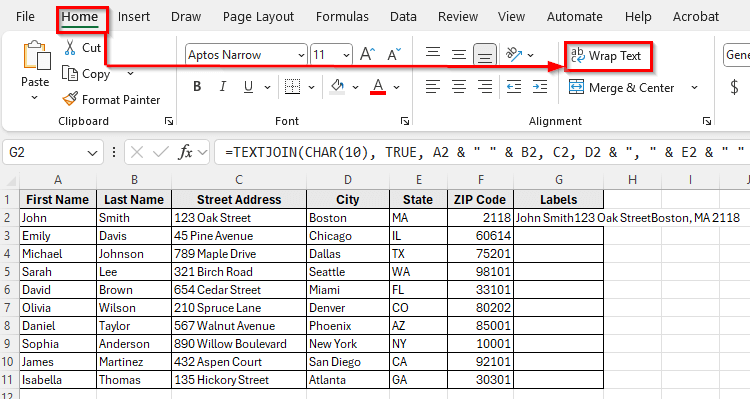
➤ Now, each part of the address shows on a new line.
➤ Next, click on Merge & Center.
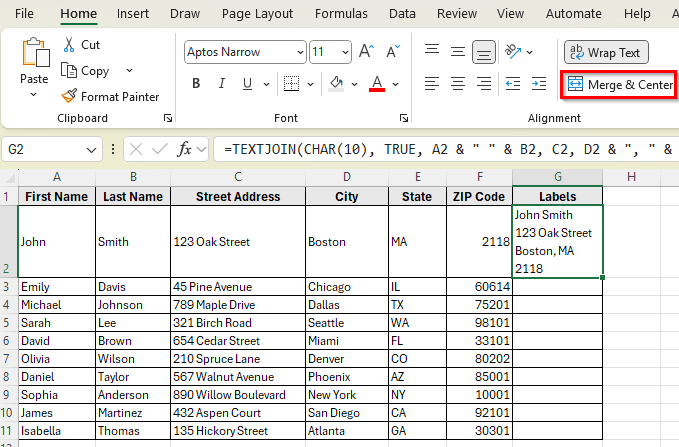
➤ It will align your label content neatly in the center of the cell.
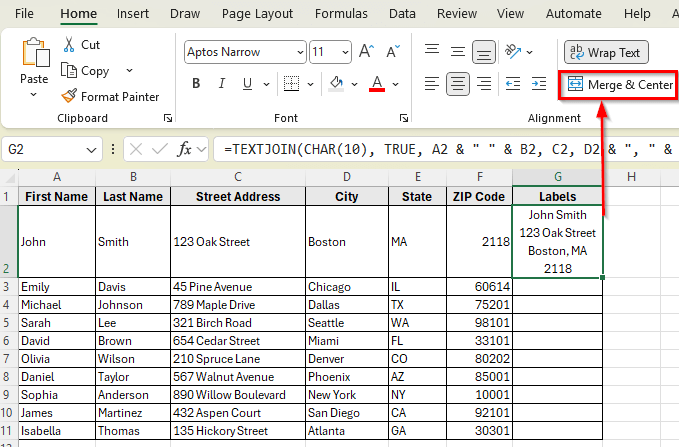
➤ Drag the fill handle down to apply the formula for all rows.
Frequently Asked Question
Can I print labels directly in Excel without Word?
Yes, you can. By combining text fields into one cell and adjusting the layout with row height and column width, you can set up labels in Excel that are ready for printing on label sheets.
Why does my formula not show addresses on multiple lines?
This happens if Wrap Text is not enabled. After entering the formula, go to the Home tab and click Wrap Text so Excel displays each line correctly.
How do I make sure my labels fit the label paper when printing?
Adjust the column width and row height to match your label sheet. Adding borders before printing can help you preview how the labels will align.
Wrapping Up
Creating labels in Excel without Word is simple once you know how to combine text fields and format your worksheet. By using formulas like CHAR, &, CONCAT, or TEXTJOIN, you can build multi-line labels directly in Excel. After that, adjusting the row height, column width, and adding borders helps your labels align properly on label sheets.
This method saves time, avoids switching between Excel and Word, and keeps everything in one place. With a little formatting, your Excel labels will be ready for printing in just a few steps.