Setting print areas in Excel ensures that only specific parts of your worksheet are printed, which is particularly useful for large datasets or reports spread across multiple sections. Instead of printing an entire worksheet and wasting paper, you can define precise areas to print, including multiple non-adjacent sections. Excel also allows you to preview each print area and adjust page breaks to ensure proper formatting before printing.
In this article, you’ll learn how to set print areas for multiple pages in Excel using the Page Layout tab, Page Break Preview and VBA. Let’s get started.
Steps to set print areas in Excel for multiple pages:
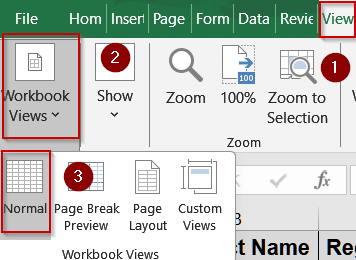
➤ Go to the View tab.
➤ Click Page Break Preview.
➤ Excel will display all print areas and page breaks as blue dashed lines.
➤ Drag the lines to adjust page breaks and ensure that your print areas fit well on each page.

Using Page Break Preview to Adjust Print Areas
Once you’ve set one or more print areas, you may discover that the default page breaks don’t divide your content the way you want. Excel’s Page Break Preview gives you a visual layout of your worksheet, displaying page boundaries as blue dashed lines. By dragging the page break lines, you can ensure each section of your data is printed exactly how you intend, which is especially helpful when dealing with multiple pages or complex worksheets.
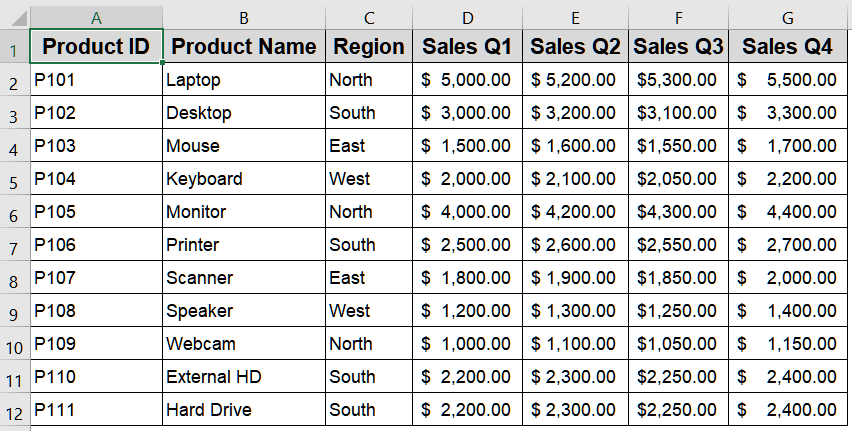
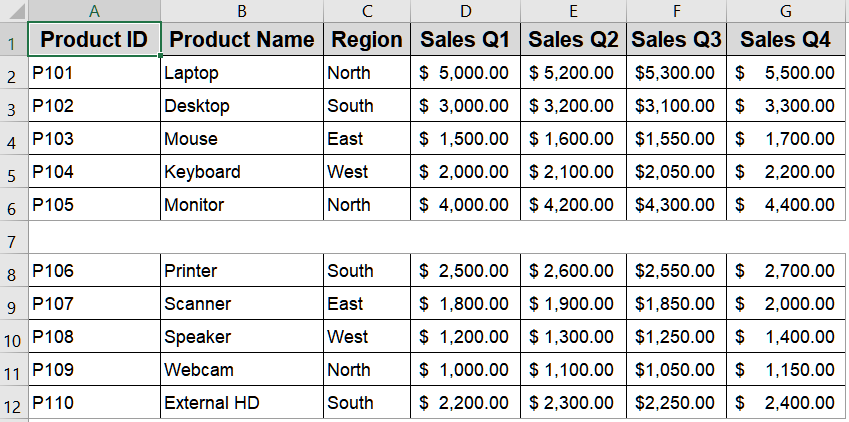
We’ll use the following dataset:
Steps:
➤ Go to the View tab.
➤ Click Page Break Preview.
➤ Excel will display all print areas and page breaks as blue dashed lines.
➤ Drag the lines to adjust page breaks and ensure that your print areas fit well on each page.

➤ Press Normal View to return to standard editing once adjustments are complete.
Adding Multiple Non-Adjacent Print Areas
In many cases, you may need to print separate parts of a worksheet without including all the data in between such as different tables, summaries, or reports scattered across the sheet. Instead of printing the entire worksheet or creating multiple files, Excel allows you to combine several non-adjacent ranges into a single print job. Each range you add becomes its own print area and is printed on a separate page, making it an efficient way to control exactly what gets printed.
We’ll use the following dataset:
Steps:
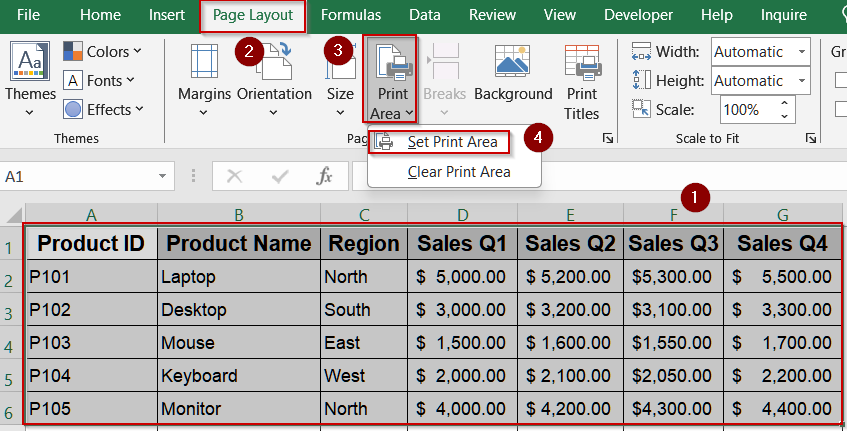
➤ Select the first range, e.g., A1:G6.
➤ Go to Page Layout >> Print Area >> Set Print Area.
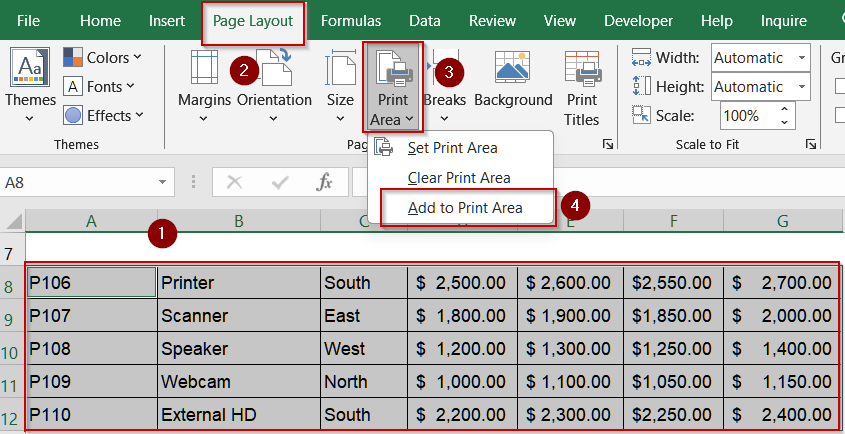
➤ Hold down the Ctrl key and select a second range, e.g., A8:G12.
➤ With both ranges selected, go to Page Layout >> Print Area >> Add to Print Area.
➤ Verify results using the Page Break Preview button at the right bottom corner of your screen.

Each selected range is now defined as a separate print area and will print on its own page.
Automating Print Areas with VBA
If you frequently print specific sections of your worksheet or multiple non-adjacent ranges, you can use VBA to automate setting print areas. This method saves time and ensures consistent results, especially for large or recurring reports.
Steps:
➤ Press Alt + F11 to open the VBA editor.
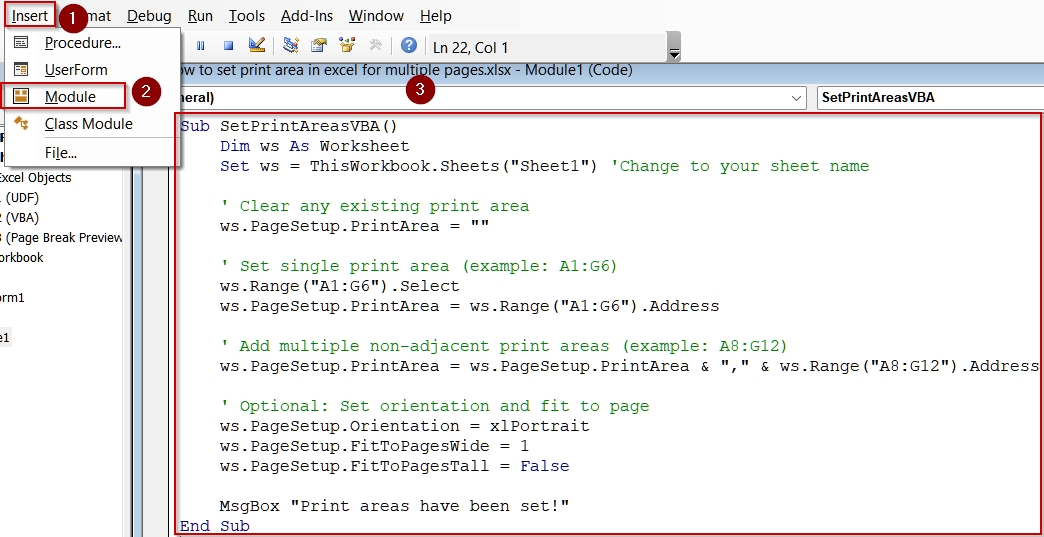
➤ Go to Insert >> Module to create a new module.
➤ Copy and paste the following code:
Sub SetPrintAreasVBA()
    Dim ws As Worksheet
    Set ws = ThisWorkbook.Sheets("Sheet1") 'Change to your sheet name
    ' Clear any existing print area
    ws.PageSetup.PrintArea = ""
    ' Set single print area (example: A1:G6)
    ws.Range("A1:G6").Select
    ws.PageSetup.PrintArea = ws.Range("A1:G6").Address
    ' Add multiple non-adjacent print areas (example: A8:G12)
    ws.PageSetup.PrintArea = ws.PageSetup.PrintArea & "," & ws.Range("A8:G12").Address
    ' Optional: Set orientation and fit to page
    ws.PageSetup.Orientation = xlPortrait
    ws.PageSetup.FitToPagesWide = 1
    ws.PageSetup.FitToPagesTall = False
    MsgBox "Print areas have been set!"
End Sub
You can adjust the ranges (A1:G6, A8:G12) according to your dataset.
➤ Close the VBA editor.
➤ Go back to Excel, press F5 key to run the macro.
➤ The print areas will now be set automatically, including multiple non-adjacent ranges, and ready to print.

Frequently Asked Questions
Can I set multiple print areas in Excel 365 or Excel 2021?
Yes, Excel 365, 2021, and most recent versions allow multiple print areas. The steps are the same as older versions. You can select non-adjacent ranges, add them to the print area, and each prints on a separate page.
Will each print area automatically go to a new page?
Yes, Excel treats each defined print area as an independent page. When printing, each range will appear on its own page regardless of location on the worksheet. This helps organize large reports efficiently without manual adjustments.
Can print areas be saved with the workbook?
Yes, once you define print areas in Excel, they are saved automatically with your workbook. The next time you open it, your selections remain intact, allowing consistent printing without the need to reset ranges every time.
Is it possible to adjust print areas without manually selecting ranges?
Yes, advanced users can use VBA macros to define and adjust print areas automatically. This is useful for recurring reports or large datasets, as it eliminates manual selection and ensures consistent printing across multiple sheets.
How do I preview and adjust print areas before printing?
Excel’s Page Break Preview lets you see all defined print areas and page breaks. You can drag lines to adjust them, ensuring each area fits properly on a page. Return to normal view after adjustments are done.
Wrapping Up
In this tutorial, we covered how to set print areas in Excel for multiple pages. You learned how to define a single print area, add multiple non-adjacent ranges, adjust them using Page Break Preview, and clear print areas when necessary. By using these methods, you can ensure your Excel reports print exactly as needed without wasting paper or misaligning content. Feel free to download the practice file and share your feedback.