Burndown charts are an excellent tool for tracking project progress, especially in Agile or Scrum environments. They visualize how much work remains versus how much time is left, helping teams stay on schedule and identify bottlenecks early. Unlike simple bar or line charts, a burndown chart plots both the ideal progress line and the actual remaining work over time making it easy to compare expectations with reality.
In this article, you’ll learn how to create a burndown chart in Excel using a project task list with estimated effort over days or sprints. We’ll walk you through entering your dataset, plotting the chart, and formatting it to show both planned and actual work remaining.
Steps to create a burndown chart in Excel:
➤ Enter a dataset with days/sprints and corresponding estimated work and actual work left.
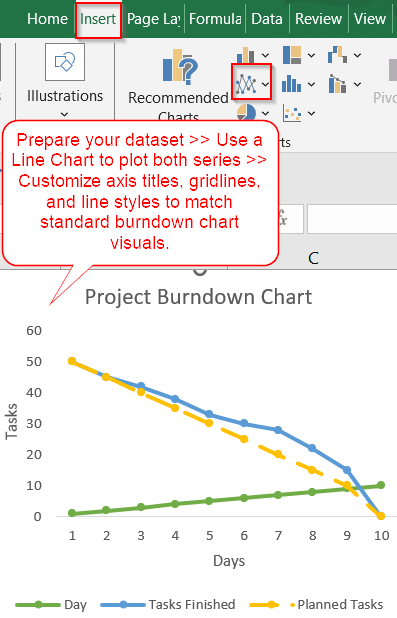
➤ Use a Line Chart to plot both series.
➤ Customize axis titles, gridlines, and line styles to match standard burndown chart visuals.
Steps to Create a Burndown Chart in Excel
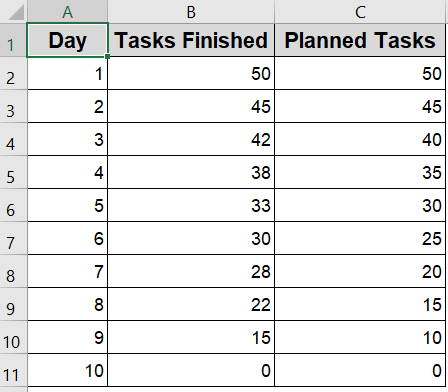
To demonstrate how a burndown chart works in Excel, we’ll use a basic dataset that tracks task completion across a 10-day sprint. The table includes the number of tasks remaining at the end of each day and the ideal number of tasks left if progress were perfectly linear. This kind of setup helps visualize whether the project is on track or falling behind.
Step 1: Enter the Dataset in Excel
Before you can create a burndown chart, you need a clear and structured dataset that represents how much work remains over time. This includes both the ideal (planned) progress and the actual work completed or remaining. Your dataset acts as the foundation of the chart and the visual won’t mean much without it. Ideally, your data should start from the full work estimate and decrease steadily (ideal) while the actual may fluctuate based on team performance.
Steps:
➤ In Column A, enter time units (e.g., Day 1 to Day 10).
➤ In Column B, enter the ideal remaining effort (start high and decrease to zero).
➤ In Column C, log actual remaining effort daily (this can go above or below the ideal line).
➤ Select the range A1:C11.
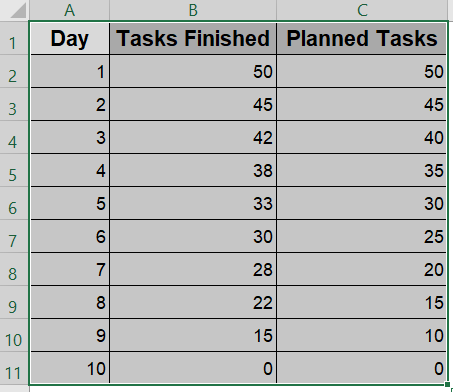
This prepares your data for plotting two progress lines.
Step 2: Insert a Line Chart
Once your dataset is organized, the next step is to visualize it using a Line Chart. Excel’s Line Chart type is perfect for comparing trends over time, which is exactly what a burndown chart does. You’ll use it to display both the ideal progress (how the project was supposed to go) and the actual progress (how it’s really going). This creates a side-by-side view that helps you quickly assess if your team is ahead, on track, or falling behind.
Steps:
➤ Go to the Insert tab >> Click the Insert Line or Area Chart icon.
➤ Choose Line with Markers (or just Line).
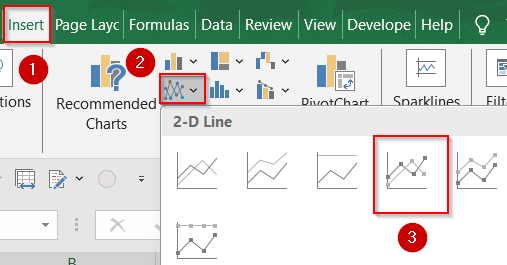
➤ Excel will plot both the Planned and Finished task values across the time axis.
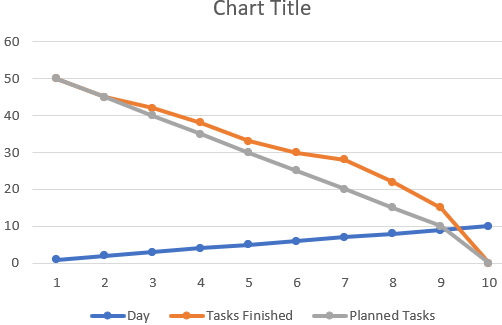
You now have the foundation of a functional burndown chart.
Step 3: Customize the Burndown Chart Appearance
Now that the chart is in place, it’s time to fine-tune its appearance for clarity and professionalism. By customizing line styles, adding axis titles, and cleaning up visual clutter, you make the chart easier to interpret for stakeholders, project managers, or team members during sprint reviews or daily stand-ups.
Steps:
➤ Click the chart title to edit it (e.g., “Project Burndown Chart“).
➤ Turn off Gridlines from Chart Elements for better clarity.
➤ Use Chart Design tab >> Select Data to confirm both series are plotted.
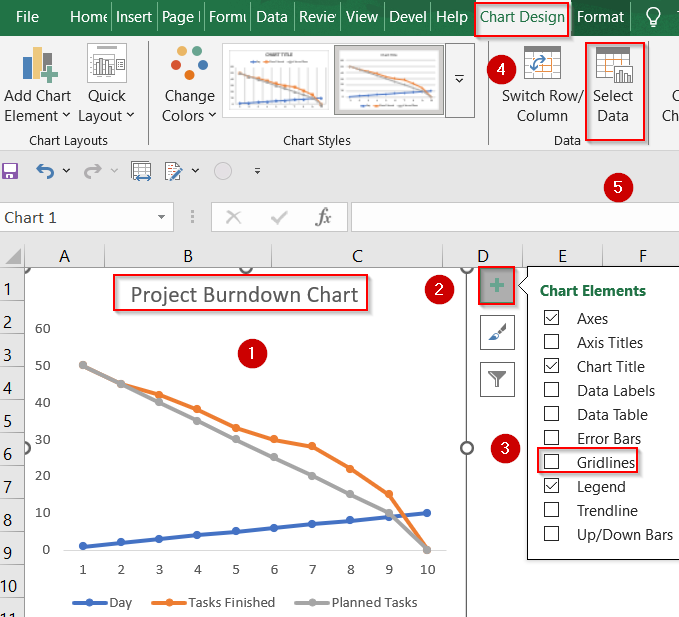
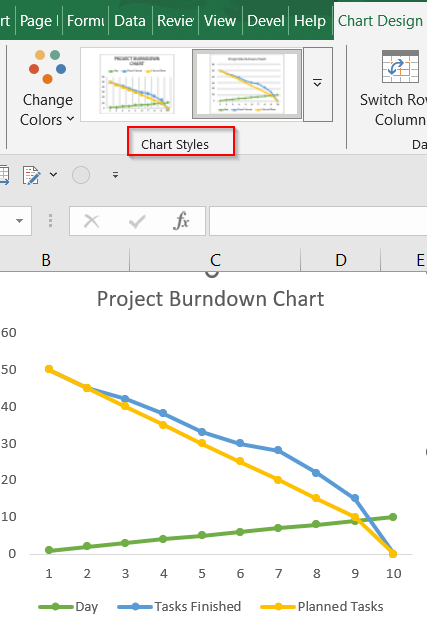
➤ You can change color using the Chart Styles group.
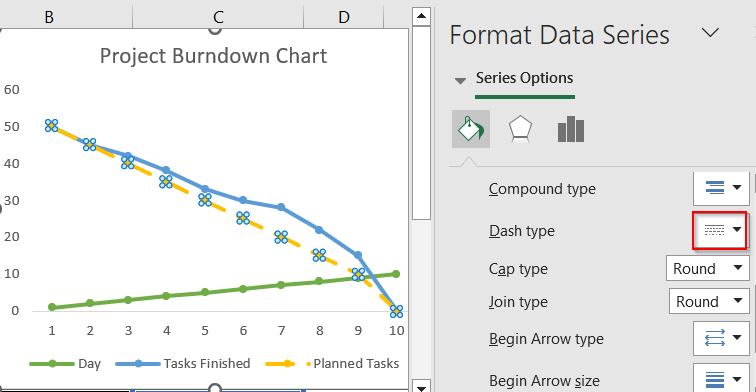
➤ Format the Planned line (e.g., dashed) and Finished line (solid color) using Format Data Series which can be accessed by right-clicking on the chart.
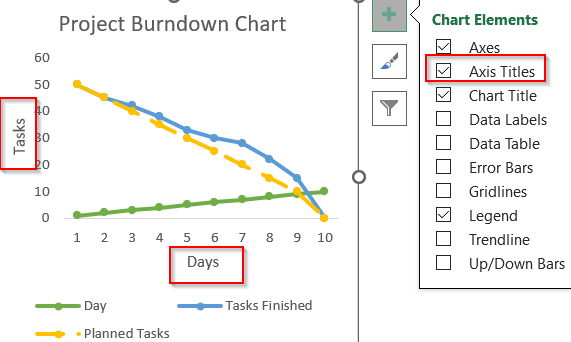
➤ Add a vertical axis title called Tasks and a horizontal axis title called Days.
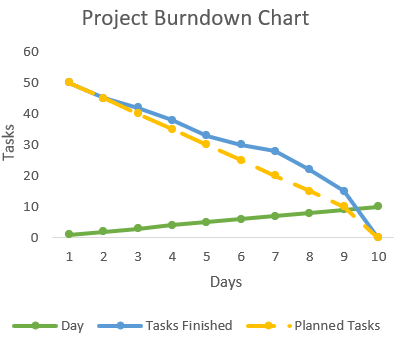
Your chart now clearly compares planned vs. actual task progress over time.
Frequently Asked Questions
What does a burndown chart show in Excel?
A burndown chart in Excel visually tracks the remaining work over time versus the planned effort. It helps project teams monitor progress and quickly spot if they’re falling behind or staying on track.
Can I update the chart automatically?
Yes, the chart will update automatically if it references a dynamic data range. As long as you update your “Actual Remaining Work” column daily, the chart reflects those changes in real-time without manual adjustments.
What’s the difference between a burndown and burnup chart?
A burndown chart shows how much work is left to complete, while a burnup chart highlights how much work has already been finished. Burnup charts also include the total project scope for better clarity.
Can I use sprints instead of days?
Yes. Instead of labeling your timeline with daily intervals, you can replace them with “Sprint 1,” “Sprint 2,” and so on. This makes your chart more agile-friendly for sprint-based project tracking.
Is there a template I can download?
Yes, many websites offer free Excel templates for burndown charts. You can also customize your own chart setup and save it as a personal template for reuse in future projects.
Wrapping Up
In this tutorial, we learned how to create a burndown chart in Excel to track remaining work over time. From preparing a basic dataset with days and effort values to inserting and customizing a dual-line chart, each step helps visualize project progress effectively. Feel free to download the practice file and share your feedback.