Tracking upcoming dates in Excel is essential for managing deadlines, events, and tasks efficiently. Conditional formatting allows you to automatically highlight dates that are approaching, saving time and reducing manual tracking.
In this article, we will cover three practical methods to highlight dates within 30 days using Excel’s built-in conditional formatting. You will learn how to apply rules to ranges, specific reference dates, and dynamic formulas that update automatically.
Steps to use conditional formatting dates to highlight dates within 30 days:
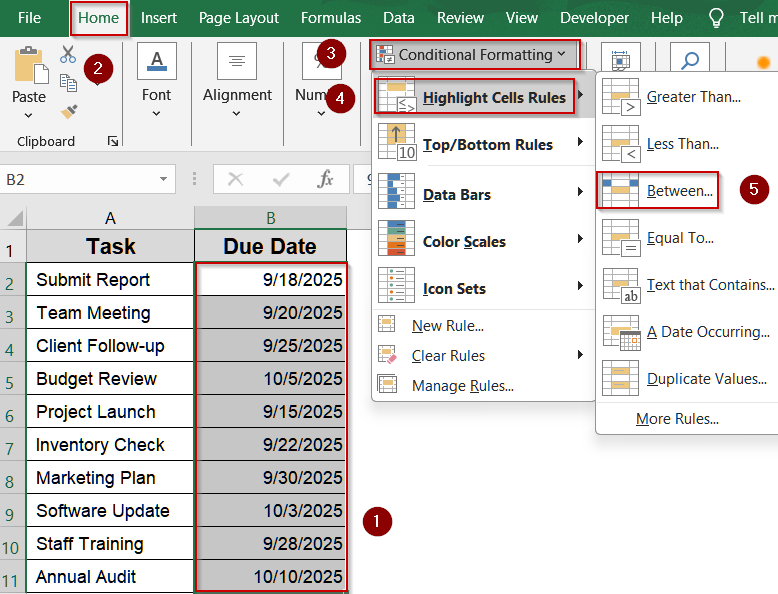
➤ Select the range containing your dates. For example, B2:B11.
➤ Go to Home tab >> Conditional Formatting >> Highlight Cells Rules >> Between. A dialog box will appear.
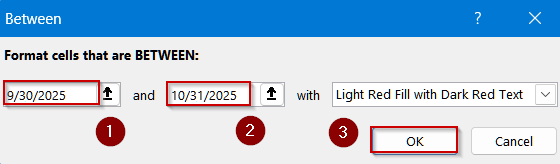
➤ In the dialog box, set the start and end dates to define your 30-day range. For instance, 9/30/25 to 10/31/25.
➤ Click OK to apply the formatting.
Highlight Dates Within a 30-Day Range Using Conditional Formatting
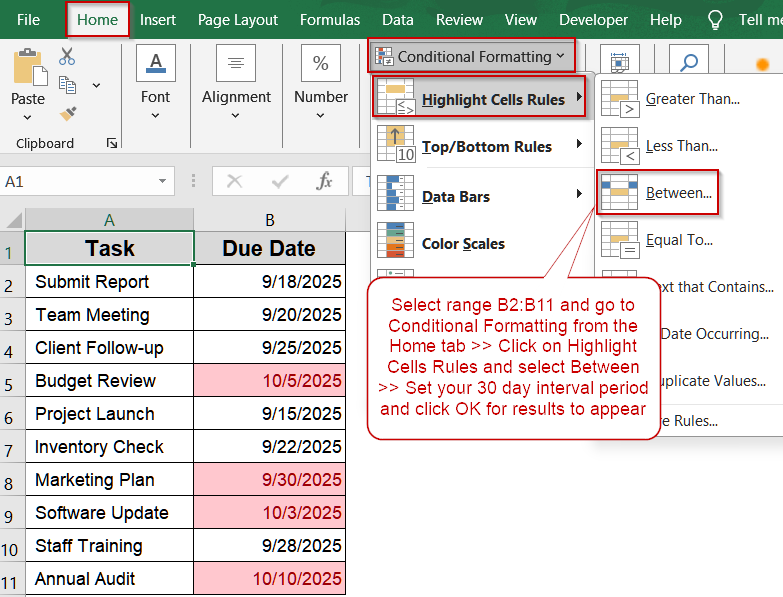
This method is ideal when you want to highlight all dates that fall within a specific range, such as deadlines or upcoming events. Using Excel’s Between option in Conditional Formatting allows you to quickly visualize dates within a 30-day window.
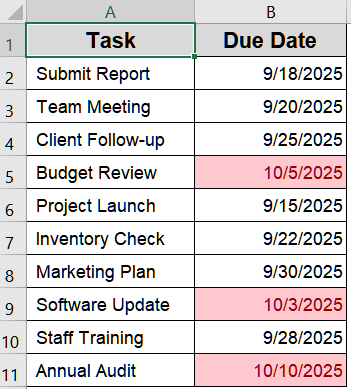
We’ll use the following dataset:
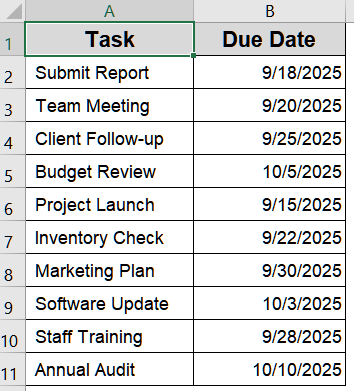
Steps:
➤ Select the range containing your dates. For example, B2:B11.
➤ Go to Home tab >> Conditional Formatting >> Highlight Cells Rules >> Between. A dialog box will appear.
➤ In the dialog box, set the start and end dates to define your 30-day range. For instance, 9/30/25 to 10/31/25.
➤ Click OK to apply the formatting.
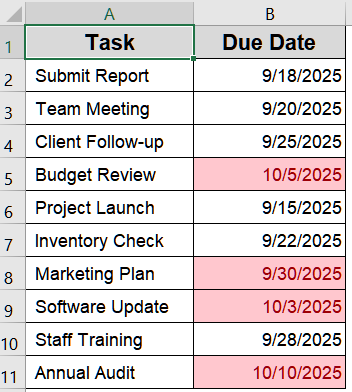
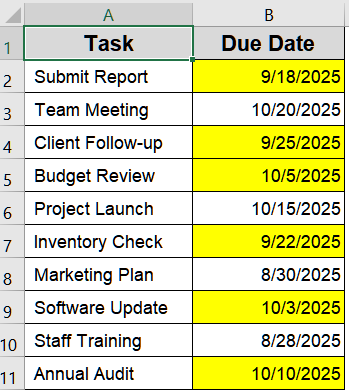
Now, all dates within the selected 30-day range are highlighted, giving you a clear visual indication of upcoming deadlines.
Conditional Formatting for Dates Within 30 Days for a Specific Date
Sometimes, you may want to highlight dates relative to a specific month or reference date. Excel’s A Date Occurring option makes this quick and easy, letting you select periods such as last month, this month, or next month.
Steps:
➤ Select the range of dates you want to format, for example, B2:B11.
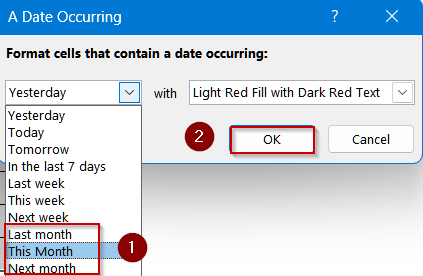
➤ Go to Home >> Conditional Formatting >> Highlight Cells Rules >> A Date Occurring. A dialog box will appear.
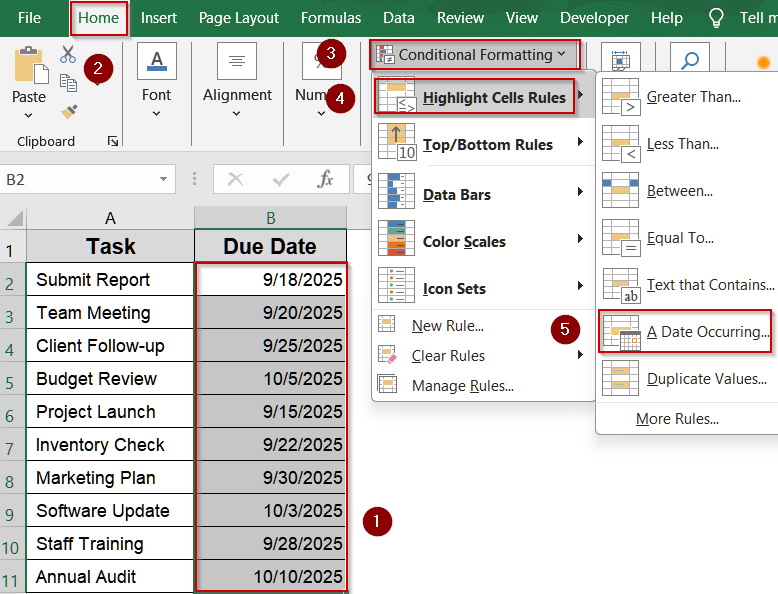
➤ From the date selection dropdown, choose the period you want to highlight, such as Last Month, This Month, or Next Month.
➤ Click OK to apply the formatting.
Now, the selected dates are highlighted based on your chosen month or period such as Next Month, allowing you to quickly identify dates that are relevant to your schedule.
Use AND and TODAY Functions to Highlight Dates Within 30 Days Dynamically
This method allows you to automatically highlight upcoming dates without specifying a reference date manually. By combining the AND and TODAY functions in a conditional formatting formula, Excel dynamically identifies all dates that fall within the next 30 days. This is ideal for tracking deadlines, events, or project milestones in real time, ensuring your spreadsheet updates daily and provides a clear visual cue for upcoming tasks or important dates.
Steps:
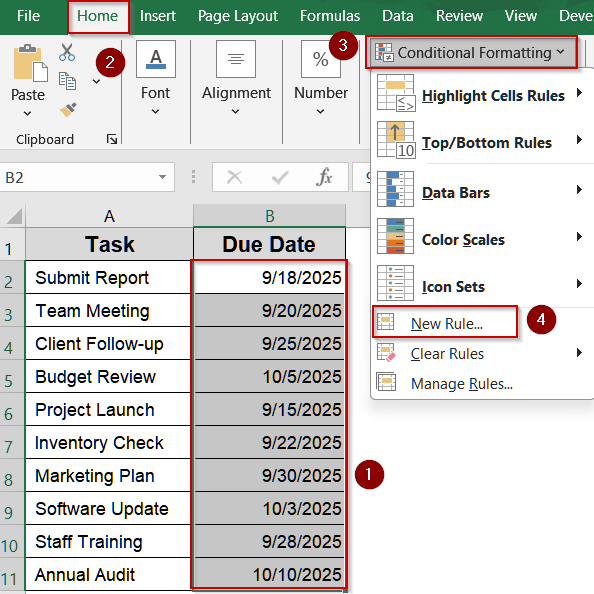
➤ Select the range containing your dates, for example, B2:B11.
➤ Go to Home >> Conditional Formatting >> New Rule.
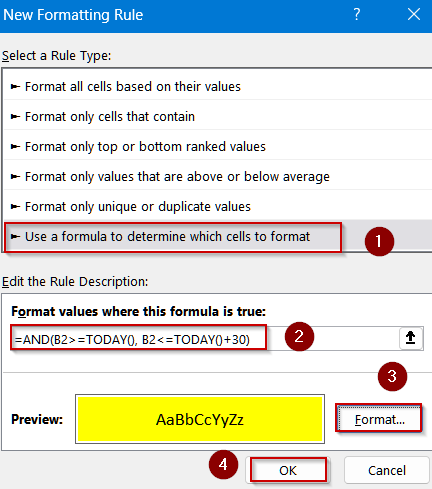
➤ Click on Use a formula to determine which cells to format
➤ Enter the following formula:
=AND(B2>=TODAY(), B2<=TODAY()+30)
➤ Click Format, choose a fill color (for example, yellow), and click OK.
Now, Excel will automatically highlight all dates within the next 30 days relative to the current date, updating dynamically each day, making it easy to track upcoming deadlines efficiently.
Frequently Asked Questions
Can I highlight past dates along with upcoming dates within 30 days?
Yes. By adjusting the formula to include past dates, such as =AND(B2>=TODAY()-30,B2<=TODAY()+30), you can highlight all dates within 30 days before and after today, helping track deadlines and overdue tasks efficiently.
Will the formatting update automatically every day?
Yes. When you use a dynamic formula with TODAY function, Excel recalculates the condition each day automatically. This ensures that cells are highlighted only when the dates fall within the defined 30-day window, keeping your schedule current.
Can I apply different colors for different date ranges?
Yes. You can create multiple conditional formatting rules with unique formulas for each specific date range. Assigning different fill colors for various ranges helps visually separate upcoming, urgent, or distant deadlines for easier tracking.
Is it possible to apply these rules to an entire column?
Yes. Conditional formatting can be applied to an entire column of dates. Using relative references like B2 ensures that the formula adjusts automatically for each row, highlighting every relevant date consistently across the column.
Can these methods work with tables or structured ranges?
Yes. Excel tables and structured ranges work perfectly with conditional formatting. Using structured references like Table1[Due Date] allows the formatting to expand automatically as you add or remove rows, keeping the highlights accurate and dynamic.
Wrapping Up
In this tutorial, we explored three methods to highlight dates within 30 days in Excel using conditional formatting. These techniques help track deadlines efficiently, whether for ranges, specific dates, or dynamically updating upcoming dates. Feel free to download the practice file and share your feedback.