
Printing a large Excel spreadsheet can be challenging when all your data doesn’t fit neatly on a single page. Without proper adjustments, columns or rows might get cut off, making the printout unreadable or unprofessional.
In this article, we will explore three effective methods to print an Excel spreadsheet across multiple pages. You’ll learn how to use scaling options to fit your data, apply keyboard shortcuts and run VBA code to automate the printing process. Let’s get started.
Steps to print Excel spreadsheet on multiple pages:
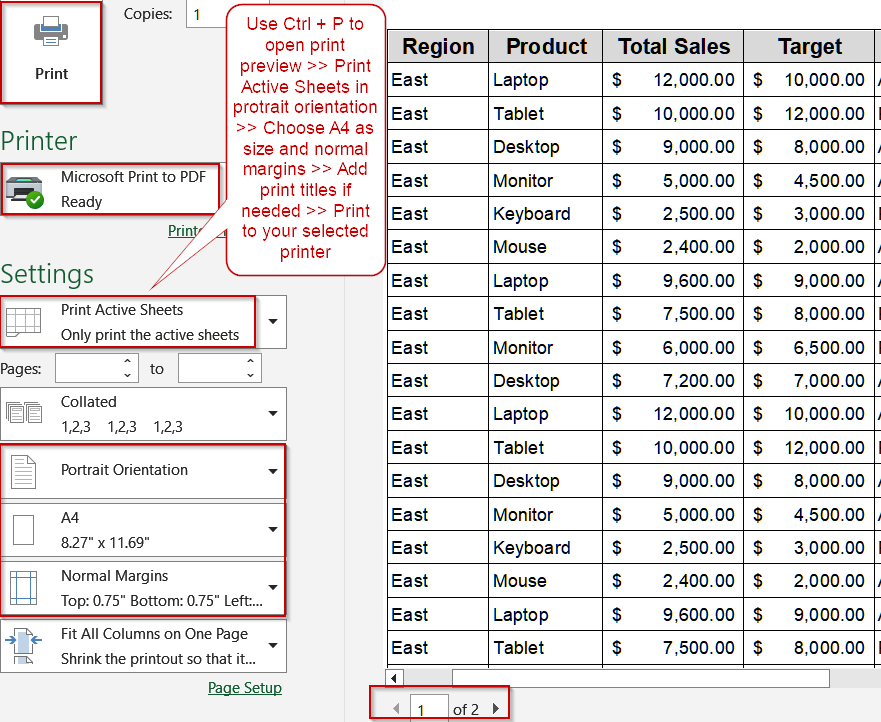
➤ Press Ctrl + P to open the Print dialog.
➤ Under Settings, choose Print Active Sheets.
➤ Set Orientation to Portrait or Landscape based on your columns.
➤ Select your Page Size (e.g., A4) and Margins (Normal is recommended).
➤ To repeat headers, click Page Setup >> Print Titles and choose your header row.
➤ Choose your printer or Microsoft Print to PDF.
➤ Click Print to generate your document.
Adjusting Scaling Options to Fit Pages
Printing large Excel spreadsheets with many columns or wide datasets can be challenging. Columns may spill onto multiple pages, and data can look misaligned if not handled properly. Excel’s scaling options allow you to automatically shrink or expand your spreadsheet so that it fits neatly across multiple pages. This method is particularly helpful when you want to maintain your column structure, ensure headers remain visible, and avoid manually inserting page breaks.
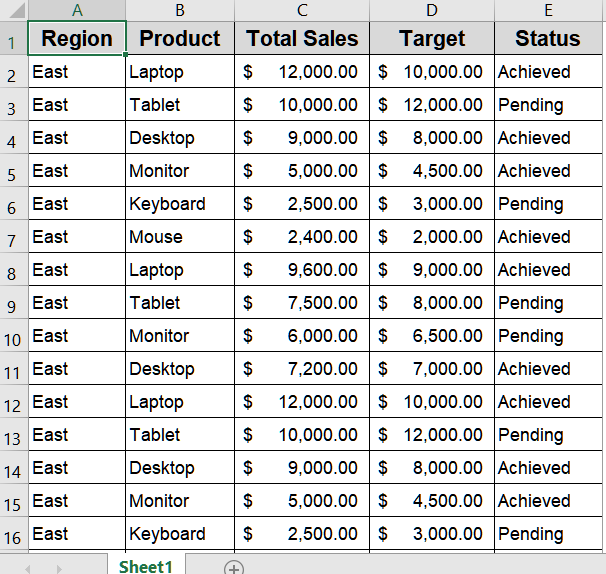
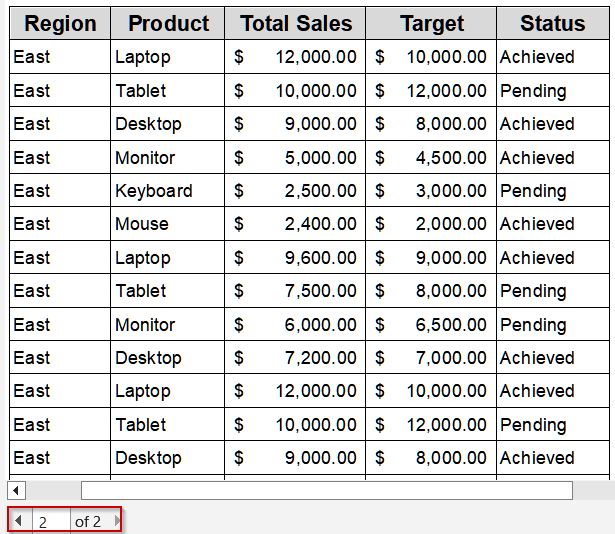
We’ll use the following sales dataset for our demonstration:
Steps:
➤ Open your spreadsheet.
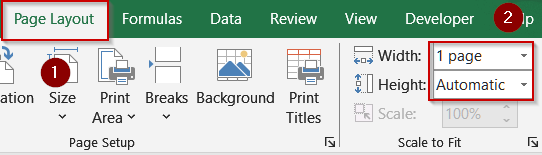
➤ Go to the Page Layout tab.
➤ In the Scale to Fit section, adjust Width to 1 page and Height as needed.
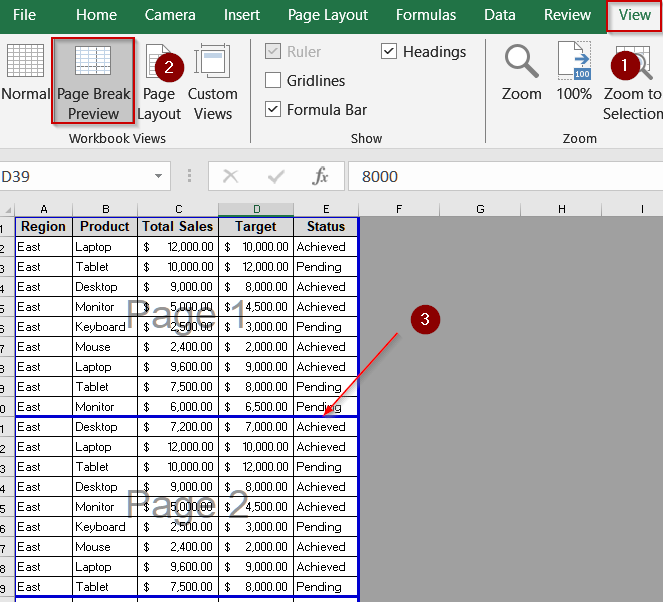
➤ Switch to View tab >> Page Break Preview to see the bold blue outline of your data on pages.
➤ Check that all columns appear on the same page and adjust scaling if necessary.
➤ Click File >> Print, select your printer, orientation, page size, and margins.
➤ If headers disappear on subsequent pages, go to Page Layout >> Print Titles.
➤ In Rows to repeat at top, select your header row (e.g., Row 1).
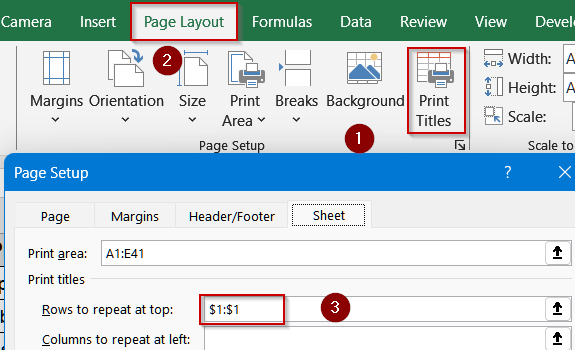
➤ Click OK, then preview the print layout.
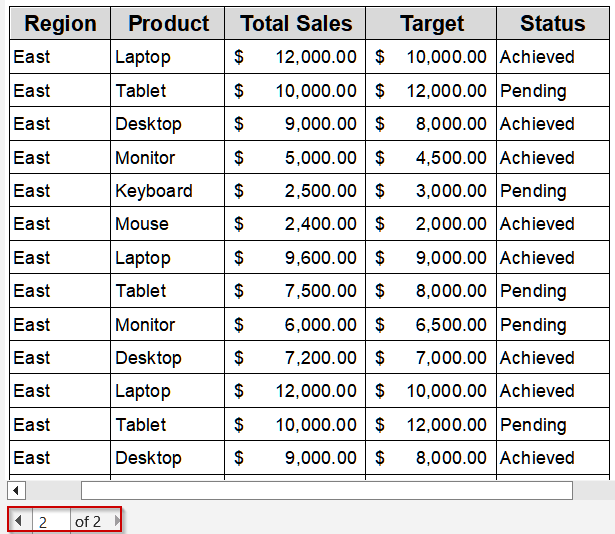
➤ Confirm everything prints correctly and click Print.
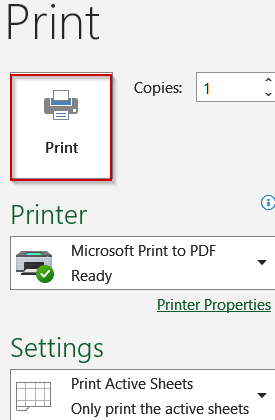
This method ensures your entire dataset fits across multiple pages without losing readability.
Printing Excel Spreadsheet on Multiple Pages Using Keyboard Shortcuts
Sometimes, you need to print quickly without navigating multiple menus in Excel. Keyboard shortcuts provide a fast and efficient way to access print settings, configure page layout, and generate multi-page printouts. This method is ideal for users who want to save time, quickly adjust headers and footers, or scale columns to fit pages without manually adjusting each option.
Steps:
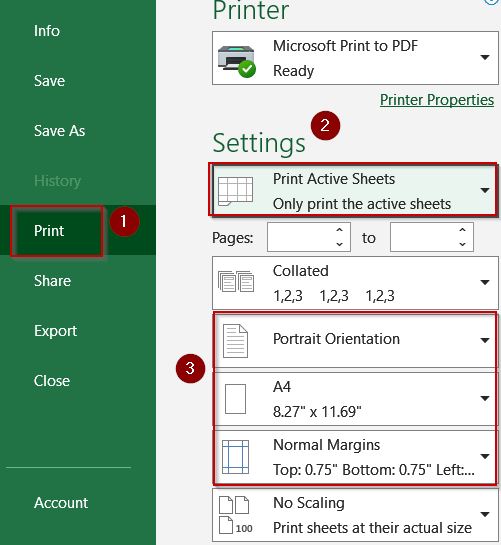
➤ Press Ctrl + P to open the Print dialog.
➤ Under Settings, choose Print Active Sheets.
➤ Set Orientation to Portrait or Landscape based on your columns.
➤ Select your Page Size (e.g., A4) and Margins (Normal is recommended).
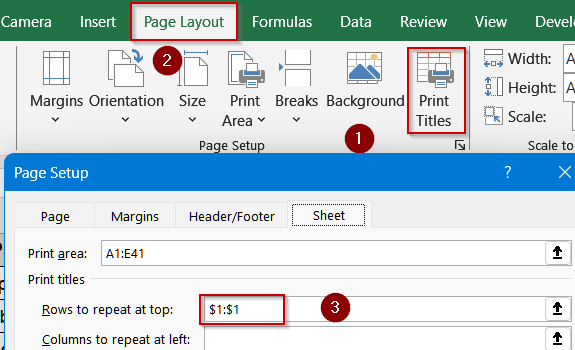
➤ To repeat headers, click Page Setup >> Print Titles and choose your header row.
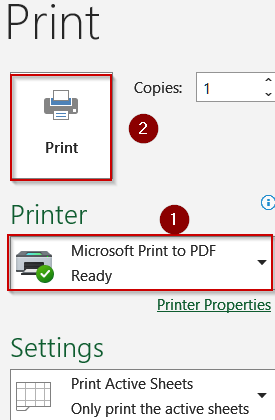
➤ Choose your printer or Microsoft Print to PDF.
➤ Click Print to generate your document.
This method is quick and effective for simple printing tasks while keeping headers visible.
Automate Printing Excel Spreadsheet on Multiple Pages Using VBA Code
For frequent printing tasks or large workbooks with multiple sheets, manually printing each page can be tedious and error-prone. Using VBA to automate printing across multiple pages saves time, ensures consistency, and eliminates repetitive manual steps. This method is especially useful for reports that must be generated regularly, for large datasets spanning multiple pages, or when you want to programmatically select specific sheets or page ranges for printing.
Steps:
➤ Press Alt + F11 to open the VBA Editor.
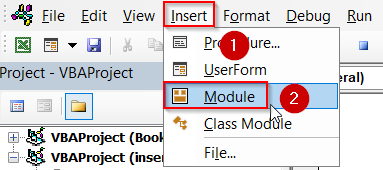
➤ Go to Insert >> Module to create a new module.
➤ Paste the following code (replace Sheet1 with your sheet name):
Sub PrintMultiplePages()
    Worksheets("Sheet1").PrintOut From:=1, To:=3
End Sub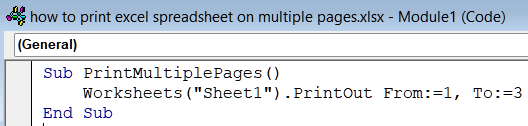
➤ Close the editor and return to Excel.
➤ Run the macro by pressing F5 key.
➤ Choose your printer or save as PDF when prompted.
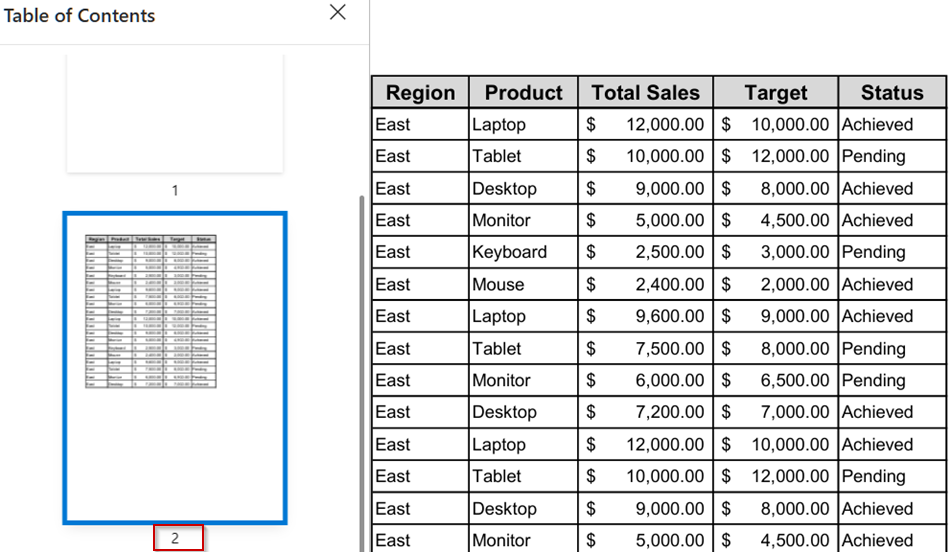
Now Excel prints your selected pages automatically which is ideal for repetitive printing tasks.
Downloadable Resources
Get our practice workbook or necessary files that we have worked with to prepare this article.
Print Sheets on Multiple Pages.xlsx
Frequently Asked Questions
How do I insert a page break in Excel?
To insert a page break, select the row or column where you want a new page, go to the Page Layout tab, click Breaks, and choose Insert Page Break. Preview in Page Break Preview for adjustments.
Can I print a large spreadsheet on one page?
Yes, by using scaling options under the Page Layout tab, you can fit your spreadsheet to a specific number of pages wide and tall. Adjusting scale ensures all content prints without cutting off columns or rows.
What is Page Break Preview in Excel?
Page Break Preview visually shows where Excel will split your data across pages. You can drag the blue dotted lines to adjust page breaks, ensuring your spreadsheet prints exactly as you want without missing information.
How can I fit all columns on one page?
Go to Page Layout >> Scale to Fit, set Fit To to 1 page wide, and leave height automatic. Excel will resize the spreadsheet horizontally so all columns fit on a single printed page on your printout.
Can I combine manual page breaks and scaling options?
Yes, you can use manual page breaks for precise control while also applying scaling options to fit the spreadsheet across multiple pages. This combination ensures readability and professional printing of large datasets.
Wrapping Up
In this tutorial, we explored three effective methods to print an Excel spreadsheet across multiple pages. By using keyboard shortcuts, scaling options, or VBA macro, you can control layout, maintain readability, and ensure professional, well-structured printouts for any dataset. Feel free to download the practice file and share your feedback.